All Categories
Featured
Table of Contents
- – Rv Trailer Roof Repair Norco, CA
- – OCRV Center
- – Rubber Roofing For Rv Norco, CA
- – Best Rv Roof Repair Norco, CA
- – Rubber Roofing For Rv Norco, CA
- – Rv Rubber Roof Replacement Cost Norco, CA
- – Resealing Rv Roof Norco, CA
- – Rv Roof Replacement Norco, CA
- – Rubber Roofing For Rv Norco, CA
- – Replace Rv Roof Norco, CA
- – Rubber Roofing For Rv Norco, CA
- – Rv Rubber Roof Maintenance Norco, CA
- – Roof Repair For Rv Norco, CA
- – Rv Roof Repair Fiberglass Norco, CA
- – OCRV Center
Rv Trailer Roof Repair Norco, CA
If you don't do this after that applying brand-new Recreational vehicle roof sealing can be tough as there will currently be a layer of R.V.
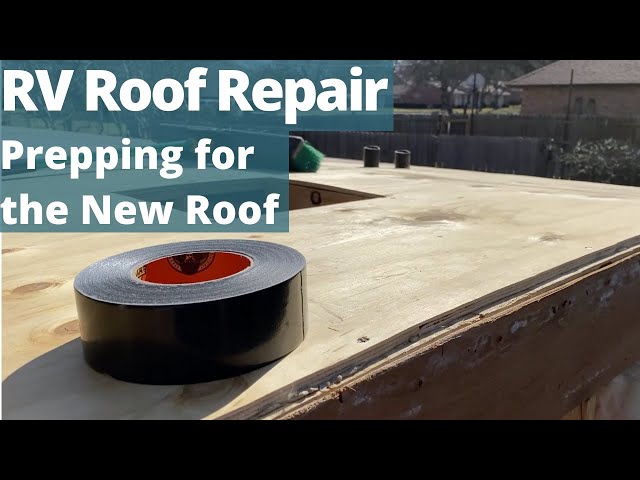
Tools you could use for make use of include paint scrappers chisels grinders. You want to make sure you do not harm any type of sublayer of your Motor home roof covering just shoot for eliminating the sealer and shed debris. If you have currently removed the loosened R.V. sealant that's around vents and penetrations, after that it's time to make use of some Recreational vehicle roof tape over these areas!
Rubber Roofing For Rv Norco, CA
Tough Roofing Tape is a rubber roof tape that follows your surface and is 100% waterproof. The tape has a textile mesh that finishings can be related to to produce a 100% water resistant membrane to your motor home roof covering. Apply Challenging Repair layer over the top of the tape repair work.
Be certain to cover the tape and the surface around the tape up to 3 to 6 inches to ensure full waterproofing When R.V.'s are produced they usually utilize silicone sealer which which sticks inadequately and ultimately lead to peeling and breaking causing damage or water to enter. While it does aid protect your R.V.'s roofing and penetrations from the elements most motor home repair work originate from utilizing this sort of coating to secure your motor home roofing system.
or a new one then you might desire to make sure its sealed appropriately with a solid recreational vehicle's layer. When RV roof covering repair service is completed around the whole R.V.'s roof covering it is essential to make sure you make use of an extremely strong recreational vehicle sealer that can stand up under all sorts of weather! The R.V.'s roof covering can take a whipping with time which is why it is very important to use the very best Rv sealant brand name! Top Recreational Vehicle Sealer Brands To Take Into Consideration When Repairing Your R.V.
Its has rust and mold inhibitors as well as is 86% reflective to sunlight. Prior to securing and layer R.V.'s with challenging ROOF recreational vehicle is essential to tape off around the perimeter of your R.V.'s roof so you do not obtain sealant on any kind of other component! This can be done with painters tape or duck brand 38806 motor home risk-free concealing tap.
Best Rv Roof Repair Norco, CA
If your recreational vehicle is new or old after that you need to take into consideration securing up any type of leaks with Hard Roofing system RV Covering before water damage makes it much more pricey! We recommend you check out our difficult ROOFING RECREATIONAL VEHICLE SETS and several of our tutorial video clips that explain this even more in depth. If your seeking the most effective motor home Rubber Roof Covering or Sealant after that you discovered it.
Recreational vehicle roofing system care is a crucial yet conveniently featureless part of keeping your motor home. Routine maintenance can protect against damage, leaks and other issues that can result in extensive, expensive repair services. It is vital for RV proprietors to comprehend what they require to do to keep their RV roofing system tidy and sealed.
The type of material a RV roofing is made from depends on the version. While many traveling trailers have rubber roofing systems, clamshell trailers and motorhomes are most likely to have fiberglass roofing systems.
Rubber Roofing For Rv Norco, CA
The white product is energy-efficient and can assist your RV stay great. Nonetheless, TPO is vulnerable to UV damages if left in the sun without the suitable upkeep. EPDM is among the most resilient RV roofing alternatives. It is immune to scrapes and scuffs, and it can hold up against straight sunshine and heats.
Fiberglass roof coverings are made of artificial materials and glass fibers. The advantages of fiberglass Motor home roofing systems include their lightweight layout and durability versus rust and rot.
While the material can last a very long time, aluminum has some drawbacks to consider it has to be secured, which can develop joint failure, and the material can conceal leaks. The roof covering is the frontline versus the elements, making it vulnerable to damage. Lots of elements can trigger problems with a RV roofing system, including: Years when driving can damage recreational vehicle roofing systems and create the material to break down.
Rv Rubber Roof Replacement Cost Norco, CA

Sunlight, extreme temperature levels and rainfall can compromise the stability of a Recreational vehicle roofing system and cause additional damages. Some of the most typical problems with Recreational vehicle roofs include: If the roofing material has openings or degradation, or the roofing accessories are not correctly secured, these areas can create a leak.
Depending upon the state of the roofing system's rips and splits, you might need to complete a spot repair work or change the whole roofing system. Pooled water and shade encourage the development of mold and mildew and mildew, which can be difficult to clean from a recreational vehicle roofing system. Repair Rv Roof Leak Norco. Motor home roof coverings can oxidize for many years
Recreational vehicle roofings with poor drain have reduced areas that collect water from washing or rains. Destruction can create roofing system top quality concerns that protect against finishings from adhering to the roofing.
Resealing Rv Roof Norco, CA
Carrying out recreational vehicle roof maintenance regularly provides numerous benefits: Though normal maintenance requires you to invest money and time right into cleaning and repairing your roofing, you will conserve a lot more over time. Maintenance aids your RV last longer by repairing small concerns before they end up being significant problems. All sorts of weather condition can create wear and tear on your roofing.
RV roof maintenance now can make it easier to market or trade in your Motor home in the future. You will certainly need these devices and materials: Roof sealant shields the roofing of your Motor home from destructive UV rays.
Recreational vehicles that have an integrated ladder normally have a walkable roof. Follow the Motor home maker's guidelines for the roof's weight limitations. In addition, beware not to tip on the roof covering cross spars and look for obstacles when on the RV roof covering for your security. Debris, dust and dust that collect on your motor home's roof, combined with warmth and dampness, can urge mold and mildew growth.
Rv Roof Replacement Norco, CA
Cleaning your recreational vehicle roofing system several times a year gets rid of the particles and stops mildew from taking hold and causing further damage. Follow these actions to cleanse your recreational vehicle's roofing system: Sweep particles off the roof, particularly in the areas around the roof covering fixtures. Use a tube and water to rinse the roofing.
Rub the roof covering with a brush, moving in round motions. If needed, add even more cleaner and scrub till the roofing system is tidy.
Safety is likewise an issue because waxes are slippery and can make strolling on the roof risky. A recreational vehicle repair work technician can use finishings, make repairs and replace areas of or the whole roofing, relying on what your recreational vehicle's roof covering calls for. Whether your recreational vehicle's roof covering has concerns or remains in top condition, sealing and covering frequently are helpful.
This item has a moderate rough to get rid of the oxidation and can be rubbed until it shines. A UV sealant or wax safeguards the RV roof covering from UV rays, as exposure to the sunlight can make the roofing system product crack and leakage. This sealer also makes the roof shiny and protects against black touches from basing on the wall surfaces.
Rubber Roofing For Rv Norco, CA
Some Recreational vehicle insurance policy plans expect a roof substitute every 10 to 15 years. EternaBond tape is one method for Recreational vehicle roofing repair work.
This experience with camping prolongs to caring for a Motor home. KOA's helpful personnel are educated and well-informed in RV upkeep finest practices, from the roofing to the tires.
Long tale short, Progressive paid our whole initial Price quote - COMPLETELY. They took till last week to do it. This is the most awful insurance coverage claim we have actually needed to take care of. The client was extremely dismayed since they had Springtime Damage camping strategies, and we really did not recognize if we 'd have the ability to get the repair work carried out in time as a result of all the hold-ups.
Replace Rv Roof Norco, CA
He called Progressive and needs to have been not-so-nice because he obtained the adjustor's manager entailed. When the one in charge male spoke to the consumer, he was playing it up huge. He stated so as to get the repair work done as soon as possible so they might make their trip, we might purchase parts overnighted and they would certainly cover it.
It was challenging to the end. Without going right into all of it, we did the roofing system our method - the proper means - and they really did not call for the adjustor to come and inspect it after tear-down. They enabled us to send out images which, obviously, showed the damages left after tearing up the original EPDM.
Rubber Roofing For Rv Norco, CA
Provided all the problem Progressive had given us over this fixing, we meant to hang onto the motor home till we were assured payment of the final $1,542.75 they had actually withheld for the roof covering repair services. When we called them they sent out a screenshot of the request for settlement to be released, claiming they "wished it would be adequate." Due to the fact that we truly liked this consumer and he did have strategies, we allowed the RV leave the store on 3/30/18.
When we contacted them once more, they stated they 'd stop payment and release a new one. We Ultimately obtained settlement 4/23/18. Pictures of roofing system with new substratum, and then finished.
RV roof covering fixing is vitally crucial. Maybe you've discovered from experience that Recreational vehicle rubber roofing systems and tree branches do not mix.
It can make it through temperatures from -50 F to +240 F without splitting. It can be walked on, is versatile, and has good resistance to abrasion. Because of its slow aging rate in the sun, manufacturers typically provide a 10-12 year warranty on their EPDM rubber roof coverings. The majority of rubber roofs will certainly see a life expectancy of 20+ years.
Rv Rubber Roof Maintenance Norco, CA
Lengthy story short, Progressive paid our entire initial Estimate - IN FULL. They took until last week to do it. This is the most awful insurance policy claim we've had to deal with. The client was really dismayed because they had Springtime Damage outdoor camping plans, and we really did not know if we would certainly have the ability to get the repair services done in time as a result of all the hold-ups.
He called Progressive and has to have been not-so-nice since he obtained the adjustor's manager entailed. When the employer male talked to the client, he was playing it up large. He stated to get the repair services done ASAP so they can make their journey, we could purchase parts overnighted and they would certainly cover it.
Roof Repair For Rv Norco, CA
It was difficult throughout. Without going right into all of it, we did the roofing system our way - the right means - and they really did not require the adjustor ahead and evaluate it after tear-down. They enabled us to send pictures which, certainly, showed the damages left after destroying the initial EPDM.
Given all the difficulty Progressive had given us over this fixing, we meant to hang onto the recreational vehicle until we were guaranteed payment of the last $1,542.75 they had withheld for the roofing repair services. When we called them they sent a screenshot of the demand for payment to be issued, stating they "wished it would be sufficient." Because we truly liked this customer and he did have plans, we let the RV leave the shop on 3/30/18.
Rv Roof Repair Fiberglass Norco, CA
When we called them once more, they stated they 'd stop settlement and release a brand-new one. We Ultimately got settlement 4/23/18. Images of roof with brand-new substratum, and then completed.
Motor home roof covering repair work is essential. Neglecting it can endanger the integrity of your RV travel trailer or motorhome. And since dealing with a tear in your rubber roofing system is so very easy, there's no reason to delay. Possibly you've discovered from experience that RV rubber roofs and tree branches do not blend.

OCRV Center
Address: 23281 La Palma Ave Yorba Linda, CA 92887Phone: (714) 909-1444
Email: [email protected]
OCRV Center
It can survive temperature levels from -50 F to +240 F without fracturing. It can be strolled on, is adaptable, and has great resistance to abrasion. Due to its sluggish aging price in the sunlight, producers typically supply a 10-12 year warranty on their EPDM rubber roofing systems. The majority of rubber roofs will see a lifespan of 20+ years.
Roof Repair For Rv Norco, CARv Roof Replacement Norco, CA
Replace Rv Roof Norco, CA
Rv Roof Repair Service Near Me Norco, CA
Best Rv Roof Repair Norco, CA
Rv Slide Out Roof Repair Norco, CA
Rv Rubber Roof Repair Norco, CA
Resealing Rv Roof Norco, CA
Rv Roof Replacement Norco, CA
Rubber Roof For Rv Norco, CA
Rv Fiberglass Roof Repair Norco, CA
Resealing Rv Roof Norco, CA
Repair Rv Roof Norco, CA
Rv Trailer Rubber Roof Repair Norco, CA
Epdm Rv Roof Repair Norco, CA
Repair Rv Roof Leak Norco, CA
Rv Rubber Roof Replacement Norco, CA
Rubber Roof For Camper Norco, CA
Rv Roof Repair Norco, CA
Replace Rv Roof Norco, CA
Rubber Roofing For Rv Norco, CA
Rv Slide Out Roof Repair Norco, CA
Replace Rv Roof Norco, CA
Rv Roof Repair Service Near Me Norco, CA
Rubber Roof For Camper Norco, CA
Rv Roof Repair Norco, CA
Repair Rv Roof Norco, CA
Motorhome Roof Replacement Norco, CA
Rv Roof Repair Fiberglass Norco, CA
Rv Roof Repair Norco, CA
Replace Rv Roof Norco, CA
Rubber Roof For Camper Norco, CA
Repair Rv Roof Leak Norco, CA
Rubber Roofing For Campers Norco, CA
Rv Fiberglass Roof Repair Norco, CA
Replace Rv Roof Norco, CA
Rv Roof Leak Repair Norco, CA
Class C Rv Roof Repair Norco, CA
Repair Rv Roof Leak Norco, CA
Resealing Rv Roof Norco, CA
Rubber Roof For Rv Norco, CA
Rv Roof Leak Repair Near Me Norco, CA
Rv Roof Repair Fiberglass Norco, CA
Rv Roof Repair Service Near Me Norco, CA
Rv Roof Leak Repair Norco, CA
Rv Roof Repair Norco, CA
Rv Fiberglass Roof Repair Norco, CA
Rv Trailer Roof Repair Norco, CA
Repair Rv Roof Norco, CA
Rv Rubber Roof Maintenance Norco, CA
Rubber Roofing For Rv Norco, CA
Rv Rubber Roof Replacement Cost Norco, CA
Rv Roof Repair Fiberglass Norco, CA
Repair Rv Roof Norco, CA
Rv Trailer Roof Repair Norco, CA
Rubber Roof For Camper Norco, CA
Replace Rv Roof Norco, CA
Rv Trailer Roof Repair Norco, CA
Rv Rubber Roof Replacement Norco, CA
Rv Roof Replacement Norco, CA
Rv Roof Leak Repair Norco, CA
Rv Roof Maintenance Norco, CA
Repair Rv Roof Leak Norco, CA
Rv Roof Repair Norco, CA
Rv Roof Replacement Norco, CA
Rv Rubber Roof Maintenance Norco, CA
Replace Rv Roof Norco, CA
Rv Roof Replacement Norco, CA
Rv Roof Repair Near Me Norco, CA
Repair Rv Roof Leak Norco, CA
Rv Roof Leak Repair Norco, CA
Rv Roof Maintenance Norco, CA
Rv Slide Out Roof Repair Norco, CA
Rv Roof Maintenance Norco, CA
Class C Rv Roof Repair Norco, CA
Rv Trailer Roof Repair Norco, CA
Rubber Roofing For Campers Norco, CA
Rv Roof Leak Repair Near Me Norco, CA
Finding A Local Seo Pricing Norco, CA
In My Area Seo Specialist Norco, CA
OCRV Center
Table of Contents
- – Rv Trailer Roof Repair Norco, CA
- – OCRV Center
- – Rubber Roofing For Rv Norco, CA
- – Best Rv Roof Repair Norco, CA
- – Rubber Roofing For Rv Norco, CA
- – Rv Rubber Roof Replacement Cost Norco, CA
- – Resealing Rv Roof Norco, CA
- – Rv Roof Replacement Norco, CA
- – Rubber Roofing For Rv Norco, CA
- – Replace Rv Roof Norco, CA
- – Rubber Roofing For Rv Norco, CA
- – Rv Rubber Roof Maintenance Norco, CA
- – Roof Repair For Rv Norco, CA
- – Rv Roof Repair Fiberglass Norco, CA
- – OCRV Center
Latest Posts
Truck Fleet Maintenance Fullerton
Riverside Camper Trailer Service
Tustin Rv Roof Leak Repair
More
Latest Posts
Truck Fleet Maintenance Fullerton
Riverside Camper Trailer Service
Tustin Rv Roof Leak Repair