All Categories
Featured
Table of Contents
- – Painting Fiberglass Motorhome Garden Grove, CA
- – OCRV Center
- – Rv Paint And Body Shops Near Me Garden Grove, CA
- – Rv Painting Near Me Garden Grove, CA
- – Custom Painted Motorhomes Garden Grove, CA
- – Painting Fiberglass Motorhome Garden Grove, CA
- – Rv Paint Shops Near Me Garden Grove, CA
- – Custom Painted Motorhomes Garden Grove, CA
- – Rv Paint And Body Shops Near Me Garden Grove...
- – Rv Paint And Repair Garden Grove, CA
- – Rv Paint And Repair Garden Grove, CA
- – Paint Fiberglass Rv Garden Grove, CA
- – Rv Painting Garden Grove, CA
- – Rv Exterior Paint Garden Grove, CA
- – Custom Rv Paint Garden Grove, CA
- – Custom Painted Motorhomes Garden Grove, CA
- – OCRV Center
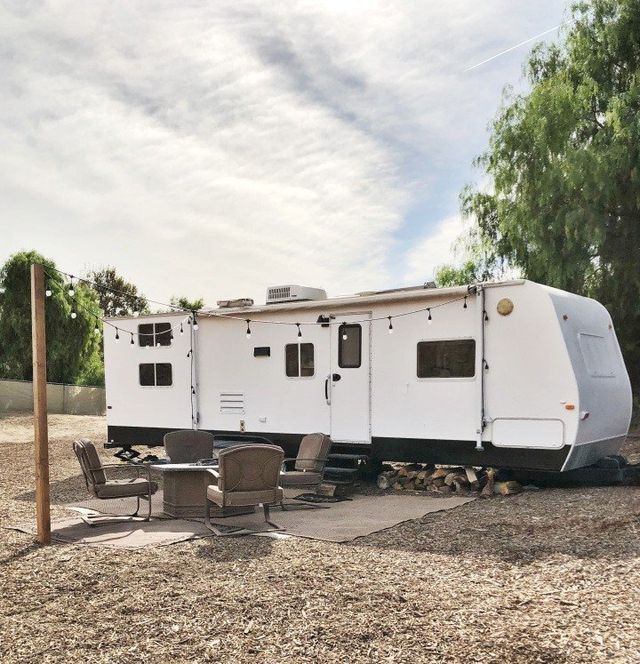
Painting Fiberglass Motorhome Garden Grove, CA
I understand I'm going to get some flack for this and some people are going to shake their heads and increase some brows. I do not comply with the regulations for auto-body paint and perhaps not also for camper painting. Below's why, That's right. I don't spray it, I do not make use of vehicle paint.
Often I do not even get rid of the stickers (wheeze!). Is it ideal? No. Is it way much better than prior to? Yes. Am I shamed to be seen with it after it has been repainted? No. Was I formerly stressed over being mistaken for a mobile meth lab? Yes. Am I stressed over it now? No.
Rv Paint And Body Shops Near Me Garden Grove, CA
I constantly assess a project prior to diving in and utilizing any kind of one approach. I will certainly constantly check the decals and attempt to eliminate them initially - Painting Rv Garden Grove. If you would like to try to eliminate the decals, you will certainly intend to try the adhering to products: The appropriate method to paint a RV exterior entails getting rid of stickers, power washing, taping and covering windows and afterwards spraying on an automobile grade paint with a paint sprayer
If you've been averted at particular camping areas based on your RV's appearance, you ought to paint. Below is what I do to prep the surface before paint: Lightly sand areas where the stickers are gurgling or peeling up Power wash everything, consisting of the roof covering Allow to dry completely Seal up corners and around all home windows with a paintable caulk.
Rv Painting Near Me Garden Grove, CA
Those things would NOT come off. Now, the siding on that particular particular trailer was wavy, not smooth. I think getting rid of stickers from a smooth-sided trailer is less complicated. I vowed that day never ever to lose that much time again. I will certainly always examine stickers and effort to remove them, yet if they look like they aren't going anywhere and the camper is greater than 20 years old, I will likely simply paint over them.
Our much older motor home with smooth sides is holding well. The more recent trailer with wavy sides started to lift a little and I needed to retouch the paint. I think more recent decals may ultimately bubble and lift, but if your recreational vehicle is older than 20 years, they remain put.
Custom Painted Motorhomes Garden Grove, CA
I always recommend making use of a good gripping guide first, due to the fact that it's hard to anticipate just how well paint will comply with various surfaces. If you are repainting right over an aluminum-sided trailer, you will wish to make use of a primer that is indicated for direct-to-metal application. With that said claimed, I have had rather good success with Behr Marquee outside paint and primer in one.
It has actually often been covered in one coat and held up well. I utilized a low luster shine (eggshell) on the outside of our 50's vintage trailer due to the fact that there were so many damages and blemishes in the home siding and I wanted a finish that would camouflage them much better. The disadvantage to this is that dust doesn't move off or wipe as wonderful as a high gloss.
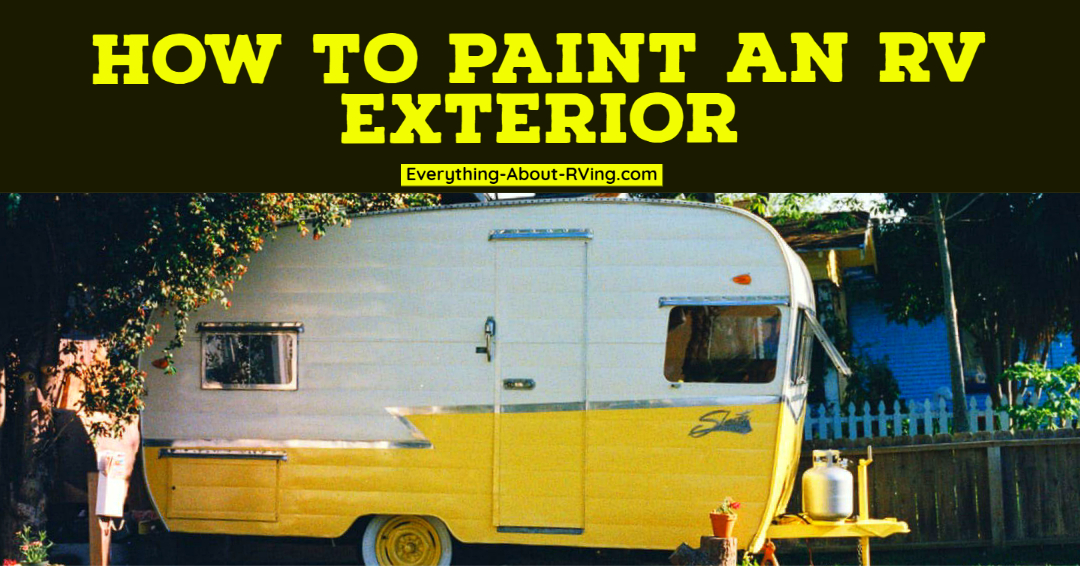
Painting Fiberglass Motorhome Garden Grove, CA
I hesitated to paint over the decals on our current RV with a semi-gloss paint, but I wanted to see if a semi-gloss would show up much more professional. I'm unsure I truly see much of a distinction. Clutching Primer Latex Paint 3/8 snooze roller (you might also make use of 1/4 snooze or a foam roller for a smoother finish) Angled brush * I explore an oil based paint as soon as and it split and flaked off! Oil based dries to a harder coating which may be as well stiff for a moving vehicle (at the very least that's my theory).
In the long run, I just went for it and never looked back! So why did I select to roll the paint instead of splashing it? Well, I'm simply a lot more positive with a roller. I've never ever been a follower of taping and covering every little thing approximately protect it from the over spray.
Rv Paint Shops Near Me Garden Grove, CA
Since of painting over the decals, I have constantly figured the roller will create a slightly distinctive surface that will certainly conceal the stickers. Once the paint has dried out and cured, I added enjoyable vinyl stickers!
I also got a fun vanity plate for the front of the camper. I additionally repainted the door pink! I am always asked how well this approach holds up. In my experience, you may have little spots that need repairing after a season of traveling, however on the whole it holds well.
Custom Painted Motorhomes Garden Grove, CA
These high website traffic locations take rather a whipping, however nevertheless, I have actually only ever seen light chipping occur in time. Overall, I feel that the improvement I obtain from painting and convenience of this method are worth a few little chips right here and there. I always keep paint on hand for repair.
A ladder helps, too. When we first became permanent RVers, I assumed I wouldn't require a ladder considering that there was one on the back of our recreational vehicle. I located it extremely hard to scrub the nose of our 5th wheel as it was also low to reach from the roof covering and as well high to reach from the ground.
The "swoosh" style decal is also not the only choice out there.
These can be positioned on the side or back of a RV (or both). The people who refurbished this motor home. Painting Rv Garden Grove made a decision to paint the door green after they eliminated the stickers. They made use of Behr Marquee Outside residence paint, which they claim has actually held up on their RV for over 4 years without touchups required.
Rv Paint And Body Shops Near Me Garden Grove, CA
Decal removal might create a noticeable difference in shade around that location. The picture listed below programs this trouble.
Gently sand the outside to assist with paint attachment. Apply primer, after that paint. As for the best kind of paint and primer to utilize for painting a Recreational vehicle outside, it seems there are numerous great choices.
Inspect out these campers with painted outsides for motivation! We began by removing the stickers with a rubber accessory, which was probably the greatest job.
We tested a few paint choices, but I believe we chose Kilz exterior primer, followed by the Behr exterior paint and primer. We used Behr exterior for the mountainscape as well." Picture Credit rating: The travel trailer below was repainted with BeautiTone porch and floor interior/exterior latex paint. The proprietor claims, "It's been four years with harsh Canadian winter seasons, and the fiberglass looks amazing!" Photo credit: To repaint the green, gray, and white motorhome in the picture listed below, the owners made use of Behr Marquee outside residence paint. They said they've had no concerns with it flaking or peeling off up until now.
Rv Paint And Repair Garden Grove, CA
They claim the paint has actually held up well in spite of the motor home being stored outdoors in Minnesota year-round. They stated the only thing they would do in a different way if they had the project to do over would be to utilize a semi-gloss paint shine instead of the flat/matte surface they chose to make it less complicated to cleanse.
Below is a side-by-side of what this travel trailer looked like in the past and after its transformation. It actually reveals just how a lot a distinction paint your Recreational vehicle can make!
They used Rust-Oleum specialist interior/exterior oil-based industrial enamel paint in flat black. They really feel the level black paint is tough to maintain tidy and would certainly suggest a shiny luster. However the client they restored this camper for demanded the level finish, and I have to confess, it does look wonderful! Picture credit history: Right here's an enjoyable one! Rachel of @RV. Family.
Rv Paint And Repair Garden Grove, CA
She composed in an Instagram message that she initially used this paint technique on the fridge inside the camper. After that, she later on determined to repaint the exterior to match! She claimed: "My driveway is officially destroyed, yet the art trailer is hugely fantastic. And I'll wreck my driveway over and over to make a desire come to life!!" Photo credit rating: The owner of this following traveling trailer really didn't remove the decals.
She says the summary of the decals was still noticeable up close yet was undetectable from five feet away. She claims the entire job cost her around $200.
Of course, I do have to do touch-ups every now and then. I have likewise included new points to the mural after seeing locations that were inspiring." Picture Credit scores: Another means to make an older RV look brand name new once more is with a motor home cover. Just how much does it set you back to have a recreational vehicle wrapped with plastic? Obviously, the cost will vary from one location to one more.
Paint Fiberglass Rv Garden Grove, CA
They additionally have a base cost of $4,500 to wrap a Motor home, not including upgrades and attachments. As you can see, wrapping a Recreational vehicle costs quite a bit more than painting it!
Picture credit rating: Strong color covers are additionally a choice for RVs. SCS Wraps in Montana did this eco-friendly motorhome solid wrap. (You can comply with the canine who travels in this recreational vehicle here!.?.!!) Picture credit: Ashley Mann started in 2017. She handed off the internet site to brand-new owners in 2022 to launch a brand-new service as an on-line entrepreneur instructor, however she still aids out as the blog editor.
Her favored thing about RV life is the difficulty of discovering the perfect method to organize a room, and she enjoys seeing all the innovative and brilliant methods individuals generate to tailor their Motor homes.
Inspect out these campers with repainted exteriors for inspiration! We started by getting rid of the decals with a rubber add-on, which was most likely the most significant job.
Rv Painting Garden Grove, CA
The proprietor claims, "It's been 4 years with severe Canadian wintertimes, and the fiberglass looks outstanding!" Photo credit rating: To repaint the eco-friendly, grey, and white motorhome in the image listed below, the proprietors made use of Behr Marquee exterior home paint. They claimed they have actually had no problems with it flaking or peeling off up until now.
They state the paint has actually stood up well despite the motor home being saved outdoors in Minnesota year-round. They claimed the only point they would certainly do differently if they had the task to do over would be to use a semi-gloss paint sheen rather of the flat/matte coating they picked to make it much easier to clean.
Rv Exterior Paint Garden Grove, CA
Below is a side-by-side of what this travel trailer resembled in the past and after its transformation. It actually reveals exactly how a lot a distinction painting your motor home can make! I love the mountain decal added as an extra detail. The sophisticated charcoal and white paint job by professional motor home restoration company Wayland Ventures makes this 2005 traveling trailer seem much more recent than it actually is.
They feel the flat black paint is hard to maintain clean and would advise a shiny sheen. The customer they remodelled this camper for urged on the flat surface, and I have to admit, it does look great! Family members.
She composed in an Instagram article that she originally utilized this paint method on the fridge inside the camper. Then, she later on chose to paint the outside to match! She said: "My driveway is formally destroyed, yet the art trailer is hugely incredible. And I'll ruin my driveway over and over to make a desire revived!!" Photo credit history: The proprietor of this following traveling trailer really didn't eliminate the stickers.
Custom Rv Paint Garden Grove, CA
She states the outline of the decals was still noticeable up close but was unnoticeable from five feet away. She says the whole job cost her around $200.
Exactly how much does it set you back to have a RV wrapped with plastic? Of course, the cost will certainly differ from one area to an additional.
Custom Painted Motorhomes Garden Grove, CA
They additionally have a base rate of $4,500 to cover a Recreational vehicle, not including upgrades and attachments. As you can see, covering a RV sets you back quite a little bit more than painting it!
, yet she still helps out as the blog site editor.
OCRV Center
Address: 23281 La Palma Ave Yorba Linda, CA 92887Phone: (714) 909-1444
Email: [email protected]
OCRV Center
Her favored thing about RV life is the challenge of finding the ideal way to arrange an area, and she likes seeing all the imaginative and brilliant ways individuals think of to tailor their Motor homes.
Rv Paint Shops Near Me Garden Grove, CAPainting Rv Walls Garden Grove, CA
Rv Exterior Paint Garden Grove, CA
Painting Rv Exterior Garden Grove, CA
Motorhome Paint Shops Garden Grove, CA
Custom Painted Motorhomes Garden Grove, CA
Painting Rv Exterior Garden Grove, CA
Rv Paint Job Garden Grove, CA
Motorhome Paint Shops Garden Grove, CA
Custom Painted Motorhomes Garden Grove, CA
Class A Rv Custom Paint And Repair Garden Grove, CA
Motorhome Painting Garden Grove, CA
Rv Painting Near Me Garden Grove, CA
Rv Paint And Repair Garden Grove, CA
Rv Exterior Paint Garden Grove, CA
Paint Motorhome Exterior Garden Grove, CA
Custom Painted Motorhomes Garden Grove, CA
Custom Motorhome Paint Jobs Garden Grove, CA
Rv Exterior Paint Garden Grove, CA
Rv Painter Garden Grove, CA
Paint Fiberglass Rv Garden Grove, CA
Custom Rv Paint Garden Grove, CA
Motorhome Paint Repair Garden Grove, CA
Rv Paint Repair Garden Grove, CA
Custom Rv Paint Garden Grove, CA
Custom Rv Paint Garden Grove, CA
Class A Rv Custom Paint And Repair Garden Grove, CA
Rv Exterior Paint Garden Grove, CA
Motorhome Custom Paint Garden Grove, CA
Painting Rv Garden Grove, CA
Custom Rv Paint Jobs Garden Grove, CA
Custom Rv Paint Garden Grove, CA
Painting An Rv Garden Grove, CA
Painting An Rv Garden Grove, CA
Class A Rv Custom Paint And Repair Garden Grove, CA
Motorhome Painting Garden Grove, CA
Rv Exterior Paint Garden Grove, CA
Painting Fiberglass Motorhome Garden Grove, CA
Rv Paint Shop Near Me Garden Grove, CA
Painting Fiberglass Motorhome Garden Grove, CA
Class A Rv Custom Paint And Repair Garden Grove, CA
Rv Paint Job Garden Grove, CA
Painting Rv Exterior Garden Grove, CA
Motorhome Painting Garden Grove, CA
Paint Fiberglass Rv Garden Grove, CA
Motorhome Painting Garden Grove, CA
Paint Fiberglass Rv Garden Grove, CA
Class A Rv Custom Paint And Repair Garden Grove, CA
Custom Rv Paint Garden Grove, CA
Custom Motorhome Paint Jobs Garden Grove, CA
Rv Exterior Paint Garden Grove, CA
Paint Rv Garden Grove, CA
Painting An Rv Garden Grove, CA
Rv Paint And Body Shops Near Me Garden Grove, CA
Motorhome Paint Shops Garden Grove, CA
Paint Rv Garden Grove, CA
Paint Fiberglass Rv Garden Grove, CA
Rv Paint Shops Near Me Garden Grove, CA
Paint Rv Garden Grove, CA
Rv Paint Shops Near Me Garden Grove, CA
Rv Paint And Body Shops Near Me Garden Grove, CA
Painting Rv Exterior Garden Grove, CA
Paint Rv Garden Grove, CA
Motorhome Custom Paint Jobs Garden Grove, CA
Painting Rv Garden Grove, CA
Custom Motorhome Paint Jobs Garden Grove, CA
Motorhome Painting Near Me Garden Grove, CA
Painting Rv Exterior Garden Grove, CA
Rv Paint Garden Grove, CA
Custom Motorhome Paint Jobs Garden Grove, CA
Class A Rv Custom Paint And Repair Garden Grove, CA
Rv Paint Shop Near Me Garden Grove, CA
Motorhome Custom Paint Jobs Garden Grove, CA
Custom Rv Paint Garden Grove, CA
Custom Rv Paint Jobs Garden Grove, CA
Custom Rv Paint Garden Grove, CA
Motorhome Painting Garden Grove, CA
Custom Painted Motorhomes Garden Grove, CA
Close To Me Seo Services For Small Business Garden Grove, CA
In My Area Seo Plans Garden Grove, CA
OCRV Center
Table of Contents
- – Painting Fiberglass Motorhome Garden Grove, CA
- – OCRV Center
- – Rv Paint And Body Shops Near Me Garden Grove, CA
- – Rv Painting Near Me Garden Grove, CA
- – Custom Painted Motorhomes Garden Grove, CA
- – Painting Fiberglass Motorhome Garden Grove, CA
- – Rv Paint Shops Near Me Garden Grove, CA
- – Custom Painted Motorhomes Garden Grove, CA
- – Rv Paint And Body Shops Near Me Garden Grove...
- – Rv Paint And Repair Garden Grove, CA
- – Rv Paint And Repair Garden Grove, CA
- – Paint Fiberglass Rv Garden Grove, CA
- – Rv Painting Garden Grove, CA
- – Rv Exterior Paint Garden Grove, CA
- – Custom Rv Paint Garden Grove, CA
- – Custom Painted Motorhomes Garden Grove, CA
- – OCRV Center
Latest Posts
Eye Insurance For Seniors Seal Beach
Senior Benefits Insurance Services Newport Beach
Senior Insurance Quotes Aliso Viejo
More
Latest Posts
Eye Insurance For Seniors Seal Beach
Senior Benefits Insurance Services Newport Beach
Senior Insurance Quotes Aliso Viejo